Showing posts with label singapore best beauty blog 2013. Show all posts

October 08, 2013

Urban Decay Vice 2 Palette!

Woohooo..Make up lovers and beauty junkie!! 
A new pretty palette from Urban Decay to join your collection :D
Urban Decay launch Vice 2, for those who miss it the Urban Decay Vice palette.. and for those who are just like me that can't stop buying make up stuff.

This sophisticated palette loaded with 20 ALL-NEW (and super gorgeous) Eyeshadow 
shades. It comes with a cool bright hue's, not-your-average neutrals, and sexy hits of 
smoke, all in Urban Decay decadent, revamped formula. But here’s the part that stress us out;
This palette is limited edition and it WILL sell out.

So grab yours fast, selling S$88 at Sephora Singapore.


I have not grab mine yet..but definitely will, soon!
 photo signature-lips.png

July 09, 2013

Mine and Moi Mr. skin care regime

Before some random sellers in Gmarket using my face to sell their products again, I need to clarify that..my skin today, is the result of the investment I made on my SK II purchased some years back and I've been re-purchasing SK II products ever since. 

Although, once a while I did try some other skin care for review purpose; and did stop stop using SK II for the first 3 months on my pregnancy due to my skin changes, I am glad to announce that I finally back to SK II for my skin regime.

And to answer one of the readers (Tantri's) question on is it worth to invest in SK II for the skincare?
I personally would say " BLOODY YES! " but it's all back to your skin. I know some of my friends tried SK II and didn't find it suitable for their skin, so do you purchase wisely. After all, this is not a cheap range to invest in - although definitely not the most expensive skin care as well.

I know it's been a while since I review about my personal skin care, and I finally writing it back again coz I am tired to answer people about what skin care I use and how to achieve the healthy skin. I hope people stop asking me on what skincare I use and start reading this post :P
and also, if you are looking for anti aging stuff, check out this article that talks about anti-aging prevention!


First of all: I don't have a perfect skin. 
I have hyper pigmentation, some milia seeds and little fat lump around my eyes, sometimes dark circle and definitely big eye bag. But I also have a smooth, fair complexion that I am proud of.

And apart from using skin care, I drink a lot of water daily, I take a lot of fruits, and almost never skip my daily fish oil intake. So definitely taking care of your skin from inside does count as well. I won't be discussing about hormonal thingy that cause breakouts on the skin - because I am no expert in it and I haven't do my research on this topic. :D

So yeah, back to my skin care routine - about SK II. 
* Btw, this post is not sponsored, okie?* 
I am just a normal SK II user that want to share the Yay and Nay about things I use.

and also, I will be sharing about my Mr. skincare range as well. :P

~~~~~~~~~~~~~~~~~~~~~~~~~~~~~~~~~~~~~~~~~~

This is how my bathroom wall cabinet look like:
You definitely know which one is mine :P


This is pretty much what I use regularly:
Bed head hair styling product (shine spray and the thickening paste)
Dry shampoo
Kiehl's deep pore cleansing
SK II skincare series
Decleor cleansing
Cure
Cetaphil


On daily basis, here are my heroes!


For the skin regime: it's SK II.
I can't wait to finished up my SK II skin signature and cellumination essence and tried out their new product ^^

I normally apply the SK II facial treatment essence + Skin signature in the morning, and 
treatment essence + cellumination + skin signature + SK II advance eye treatment at night. 
So far, it works wonder on my skin, especially in the morning when I wakes up and found my skin glowing radiantly and almost poreless. Check out the best anti-ageing creams from SK-II and more!

Ok, enough! I sounds like the brand ambassador already - and I hope people stop asking me on what skincare I use and start reading this post :P

Next, my Mr. skincare!

This is funny, before I was an active beauty blogger in Singapore and Indonesia blogsphere - all he applied on his face was a shaving lotion and toner I guess. 
But look at this now:

Mr. currently using Biotherm Homme for his moisturiser, Kiehl's Oil free toner which work so awesomely on his oily combination skin, Kiehl's midnight recovery concentrate and Midnight recovery eye cream ( I used Kiehl's midnight series during the 1st 3 month during my pregnancy; super loveeeeeee the smells and the texture is my skin best friend on the rough first 3 months)

Oh btw, if you have oily combination skin - you need to try Kiehl's Oil-free series.
My Mr.'s face could be damn oily whenever we are in humid weather like Sg, and Bangkok. 
 He first tried it during our holiday in Bangkok last month; and man oh man..Kiehl's oil -free series did control  oil produce in his skin without drying them up.
 So, definitely a must buy for the oily combination skin.


..and before I end this post, I know this is random..Gals - if your boyfriend or hubby is looking for the shaving foam/gel - get them L'occitan shaving gel as photo below.
It smells bloody good! - and it creates the kissing session atmosphere even better! :P


'Till later!
  

June 23, 2013

Hair Do tutorial: Romantic ROM hair do

So, I think I left you ladies hanging with this photo after my ROM make up tutorial right?


Now, shall we start by getting your tease comb ready?


As this is the simple ROM hair do that you can do it on your own..you might want to have:
Hair spray, Bobbi pin, Flower head band, and tease comb, to be around you. It just to make things easier for you to work with your hair.

Let's start!

Step 1: Separate the hair to make a bee hive puff at the crown of your head.


Lift it up..

..and puff it up. This is a kind of hair that you want to achieve in creating this romantic simple ROM up do.

2. Tease your hair!
Take a little part of your hair and back comb it in layer.
Keep doing it part by part, until it creates the messy hair as below:


Once you get the volume that you like..try to smoothen out the surface of the hair.

and get your styling hair spray ready :)

Spray it generously! while styling the hair to keep in place.

Get 2 Bobbi Pin to secure the hair in X shape.

3. Curl/style your hair!
Using Panasonic multi styling straightener curler in medium size to give a little hold of the hair texture when you style it.


More info about the product go to:
www.panasonic.asia/beauty
www.facebook.com/sgpanasonic


Place the hair between the curler and curl it outward for both left and right side of the hair.


With the Panasonic medium size curler and outward curl, you will get this hair texture.

4. Accessories!
Whether it be tiara or the flower headband that I pick for this hair do..a hair accessories could do a lot of difference in creating the look. I personally think, flower will give a romantic feel for ROM look.


I placed the flower headback all around the beehive puff I created earlier.
Bobbi pin it to keep the headband in place.

Take a section of hair and tart looping the hair through the headband..If you have a longer hair than mine, it's even better! All you need to do is to keep looping and wrapping the headband with your hair.


Slowly loop and wrapping the hair to the headband until all the hair section are looped.

Pardon my thinning hair due to the pregnancy hormone :(

Once are done with the looping thingy, it's time to work on your fringe :)

Full fringe or side fringe, both is suitable for this hair look!

I'll go for the full fringe to cover my big forehead :P

I hope this simple ROM hair do tutorial could help or inspired you to do your little DIY hairdo for your special day :)


'Till the next tutorial :)


June 22, 2013

Make up tutorial: ROM make up :)

Olla ladies and bride to be, 
Am now sharing a little tips of how I usually do ROM make up :)
- Just in case, you are new to my blog..I am a certified professional make up artist that creates beauty in Make up By Bubbly Brush -

I was inspired by few blogger friends that about to get married soon and few make up clients that I have to turned down because it will be too near to my due date. So, I was thinking..to share my tips and trick for you to see of why do you need professional MUA to help you on the big day :)
Or maybe considering of doing your own make up! why not?

This is me, without make up :)
I know, I don't look good..although I would say I have a good skin as a canvas to begin with.
...and if you would like to know what did I do to my skin apart being a religious SK II user for 5 years, I also do my facial at home

On this post and the next post of my ROM hair tutorial, I am gonna show you a step by step to transform my before to the me after make up as photos below:
No photoshop in making my face look smaller and sharper, I use shading powder to contour my face and the rest is my angle in taking photos.

For ROM make up, you would want something fresh, light looking and most importantly comfortable on your skin, and this is why you should avoid many layers of foundation to cover your flaws.

Always: Conceal.
Take concealer, colour corrector of even the Kryolan TV stick in ivory like I use to cover up any flaw.

I always start my make up with a even skin tone.

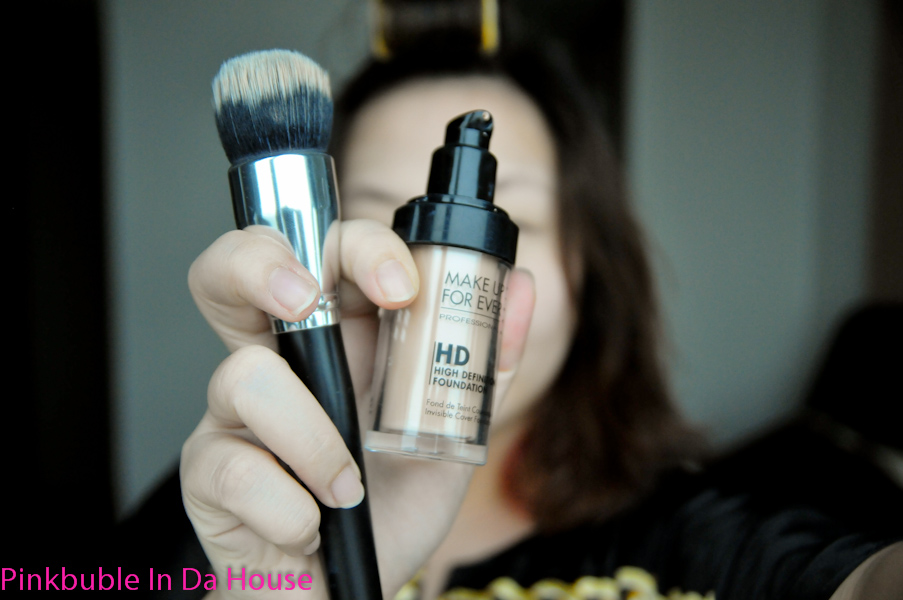
Always: Invest in a good foundation.
Oh yes, a good foundation would make your skin look flawless, and safe your time in creating a good smooth base that you want for your special day.

It's totally up to you if you want to use your hand (just make sure it's clean) or a foundation brush to even out the foundation on your face.

Always: Powder up after your foundation.
Unfortunately, we are not staying in a country that will leave us happy to go without powder up our skin after the foundation. You definitely want to keep your foundation in place to keep you going at least 4-5 hours to host your guest and photo taking session. So yeah, powder up.

Always: Contour your face.
Especially if your face are like mine - contour-less - you need contouring/shading powder to just give a subtle " mark " to name cheekbone and/or nose bridge.

For ROM make up, I don't usually go for a cream shading technique as I do for Bridal lunch or dinner day.
Let's keep it light remember?

A little on the temple, nose bridge, under the cheekbone and below the chin are some areas that will do you a lot of favour when you are taking photos. 

Always: Get a right blush colour

My skin tone is Ivory with a little pinkish tone under the sun, and I love how it looks on my skin..so I go for the pale pinkish tone for my look.

Swipe it along the cheekbone and NOT on the apple of the cheek. 
*We are not 5 y/o kindie in school performance.*

You might wondering, why I am start with blush before eye make up?
Everybody has their own way to do make up, just like when you shower..some start from the head to toe, some goes for body then the head. *I'll go the 1st one - if you care to know * :P

One thing that I always share to those who are enrolled in my private make up class, having your blush done before your eye make up works as your gauge to know how strong you want your look to be. Have you ever start with your eye make up, then you think " ah perfect! " so you finished the look with your blush and lips, and suddenly you look " Too much " ? 

Did you just nod? If you do, you might want to try my blush before brows technique. :D

Always: Trim your eyebrow neatly.
Nope, not thinly..but neatly.


Use eyebrow powder to create a softer and natural look on your eyebrow.
It just so passe' to have a nicely drawn inked eyebrow like our Momma time.


Always: Frame your eyes
Either with pencil/gel/liquid eyeliner..just frame it to define your eyes.

Extend the eyeliner to creates an illusion of a bigger eyes.
Oh, I forever use this illusion to enhance my eyes.


Next, if you have a short and fine natural lashes..you can skin the part where you have to curl your natural lash and go straight to the faux lashes.

Currently loving Starlash Kawaii TL 010 type of lash :)

But If you do have a long lashes, please..do me a favour in curling your eyelash first. :P
It's very annoying to see faux lashes going up curl while your natural lashes pointing down.

" I'm scared of eyelash curler!! "
..oh, I get this a lot whenever I am about to curl my client lashes with the normal lashes curler.

So now, let me introduce to you this lovely 
Panasonic Heated Eyelash Curler EH-SE60
More info: Panasonic facebook


It's so safe, easy to use and pretty much you just need to spend at least 1 mins per side to creates a gorgeous uplifting lashes.

It comes with heated 360 degree rotating comb and run in AA battery power.


Once you get the desire lifted lashes, let's stick our faux lashes :)

Always: Use a good eyeshadow.
Why? because it might safe your time in picking up the pigment and blending it smoothly.

As you see, I am applying " silly " colour on my entire lid below the crease and mix it with "serious "colour on the 1/3 outer part of it.

and blend it with my blending brush after dippin' it to natural eyeshadow colour.
That's pretty much all for the eye make up, pretty easy right?

As for the lips, I bet ROM won't be too much of " Wedding kiss! " and " You may kiss the bride " , so I still put a kissable natural colour gloss to my client for ROM. Although, if you prefer to go matte - that is completely fine.


Here is the final look of my ROM make up tutorial :)
Fresh, light and still do the magic of make up!

Stay tuned for the next ROM hair tutorial :)

LinkWithin

Related Posts Plugin for WordPress, Blogger...