May 31, 2015

Chic & Stylish earphone by Sudio Sweden

I am grateful for this blog, and the chance I have, to be in touch with amazing brand inside and outside Singapore. Just like this super stylish earphone by Sudio from Sweden. Focus in style and quality, Sudio range is definitely a kind that i would definitely use to prop up my iphone. I like the simplycity of Klang range, and ever since i'm not a big fans of white color earphone..and not a type to pick the plain black, I finally pick the brown color- a color with sophisticated touch. 


The whole packaging comes with a dvd box kind of shape, complete with the most elegant pouch I ever see in earphone world, a pin, and a different kind of ear plug size. It feels like opening an iphone packaging; all are in order with simplicity in design. They have the idea to create timeless elegant design that is suitable for every day of the week, regardless if we are listening to music on our way to a black tie event or enjoying a sunny day in shorts and a polo. The Sudio sound piece will be the elegant companion.
A product should be intuit and ready to use at all time. As we all can see, their philosophy being employed in their stay-in-ear feature which let the user wear the earphones like an accessory around the neck - ready to use at all time. Stayin-ear prolongs lifetime as the earphones wears out every time they are squeezed down in one’s pocket.

I personally use this earphone from my time in Singapore and now in New Zealand - the thing that make it different to me is I dress up most of my time in Singapore, while in New Zealand - I kinda loose up a lil :) But all in all, my current favourite Klang suits both my days in busy city and in more relaxed town like Auckland. Suits both on my little black dress, while walking to the mrt and a casual sweater for walk in a park on this gorgeous Autumn in Auckland. 


My daily essentials!
Burberry shade and Klang earphone by Sudio.


If you keen in getting one, which i think you should! Here is the discount code Pinkbuble15 for 15% off of the product, they do ship internationally too! Place your order now :)


 photo signature-lips.png

May 26, 2015

Gloomy weekend in Auckland!

Weekend kemaren sih malesin loh.. semulai dari gw bangun tidur sampe sekarang jam 2 siang..ujan nya sama sekali ga berenti berenti jek..dan jadi nya dingin kali ni udara!

Buat gw yang dari Singapore dengan suhu 35'C panas lembab dan sunny melulu, ini cuaca di auckland mayan nge bingungin. Mo pake sweater wool bakal kepanasan di rumah, dan di mobil, tapi bakalan pas kalo lagi di jalanan. Mo pake kaos biasa di layer jaket, juga nanggung rasanya..akhirnya gw pake heat tech stocking, celana jeans, sama knitted top with blanket scarf. Alhasil, kedinginan.

On a bright side, sekarang bener nya belon masuk winter winter amat..masi late autumn gitu deh, dan maple leave nya cantik banget..
Gw suka banget liat dedaonan warna oren kuning gini, kebayang bagus nya ootd dengan background gini. Ngomong doang yeh gw, poto ootd nya ga nongol2 ! Tapi eh tetapi, ini dikarenakan baju baju gw masi di container semuaaaa. Container kami yang dikirim dari Singapore sampe nya nanti bulan Juni, jadi setelah be beres rumah..baru deh urusan baju membaju dimulai! 

Oh kemaren itu, kami ngafe! Sama temen gw, Lolo..beserta Ella & Ethan. Dan untuk pertama kali nya Ethan enjoying babycinno - capucinno untuk baby yang isinya susu ma foam. 
Abis itu kita ke brownsbay, mumpung ada matahari..kita bawa kiddos ke taman di pinggir pantai. Brownsbay ini daerah yang yang sederatan ada cafe2 buat brunch gitu, trus dibelakang cafenya ada bagian yang kebuka ngadep ke pantai. Gw suka banget sama tempat ini, rasanya luas banget dan ijo bener. :)

Sekian update dari kami, doakan supaya bang Arip cepet cepet dapet kerja, dan bisnis gw tetep jalan yah. Dan juga, semoga container kami tiba dengan selamat di rumah baru kami. 

Have a blessed week! 


May 22, 2015

Kia Ora! We are in New Zealand!

It feels surreal to finally landed here in Auckland, and in the same time excited for start building life in our new home. 

My best friend said " keep a happy thought " when we bid goodbye in airport. Her words echoing in my mind, and i hold on to those words as I left Singapore. It's was sad moment for me to leave Friends that feel like family and step into the unknown country. I tried so hard to keep a cheerful goodbye, but i failed miserably. I cried in the airport, on the plane, and while typing this, too. I love them, and they are precious to me..and now, that we are distance away - i feel like, i don't know..alone? 

On a happier note, i am planning start the OOTD section in my blog and start writing about recipe and life as well. Throw in any ideas that you guys would like to know about living in Auckland! 

Jadi ceritanya, aku sudah pingin pensiunkan review review barang2 kecantikan, dan mau focus untuk things about my life. Make up, be bajuan, masak2an, dan tentunya soal kehidupan gw yang ga penting, tapi bakal teteup ding gw update di blog!Hahahah..macam pas kemaren gw ke groceries ini, emang aku kan kampungan yah..ga pernah liat barang2 yang ada disini..kayak:

1. Pepper bel warna warni.

Biasa kan liatnya kalo ga ijo ya merah ya?  

2. Gold kiwi yang murah aje!! 
Biasa gw makan kiwi $6.99 4 biji jek,
Ini kok sekilo $2.99..gimana toh ya itungannya...


3. Care free G-string

Kolor G string gw tau, lah ini knapa juga panty liner ikut2an ada yang G string segala yo? 


Agak2 ga biasa daku liat ginian..nanti ke depannya gw bakal share tentang yang antik2 yang temuin disini. 

Meanwhile, doakan kami yah untuk mulai idup disini.


May 14, 2015

I'm leaving on a Qantas..

Don't know when I'll be back again..oh babe, i hate to go..

Walo ga ada yang maksa gw juga pindah ke NZ, tapi tetep aja gw berasa sedih euy ninggalin Singapore. Minggu kemaren sama minggu ini, gw ketemuan sama temen temen untuk farewell..dan gw try to make it just like a normal day, karena ga mau juga mata jadi burem trus berlinang..cuman pas nyokap pulang, gw anterin dia naek taxi..ga tahan juga jek, akhirnya berlinang juga gw pas liat nyokap nitikin aer mata. :'(

Singapore has been good to me. I am very grateful for all the opportunities I had, the career, the life, the blogging, and      the friends that treat me like a family. Pretty much, a place where most of the good things has happened to me. I am forever grateful for this country, and thank you for the wonderful 9 years. I am now ready for the new adventures in life. 

Besok, tukang mover dateng dan mulai ngepak2in barang2 kita untuk masuk ke kontainer. Hari ini temen gw, Bombie
En Devi being my angel as always - dateng to help sorting things out. Sumpe, kalo urusan beberes rumah..gw ga bisa loh, bingung aja mo mulai dari mana..untung banget pas schedule mereka kosong dan langsung dateng lalala trus langsung ini kesini, itu kesitu, mending begini el, mending ini begini. Kelar. Horee! 

Chongma Kamsahamnida bomb, dep! 

Sekarang, tinggal urusan bersih2 rumahnya di hari sabtu. Rumah ku uda di cat ulang, korden uda di cuci, dan udah siap di rental. Kalo ada yang cari condo 3 bedroom di daerah Novena..let me know yah! 

Rumahku rapi, partial furnish (uda ada some fix furniture nya), uda cantik di design ma design interior, ada kulkas, oven, dishwasher, dan mesin cuci. Uda siap juga kabel2 untuk home theater, dan wine glass hanger. Monggo monggo..bole ci, ko, mampir dulu diliat..- lulusan mangga dua ni - 

Ini living room nya..


Tolong bantuin info info yaaa kalo ada yang nyari :)) 

Sekian, sampe the next update di New Zealand. 


May 06, 2015

Tips & Trick untuk jadi beauty blogger :)

Postingan ini aku tulis pake bahasa Indonesia, walo mestinya pake bahasa inggris aja yah biar bisa di pin di pinterest sekalian - tetep yah, mo eksis ^^ - Tapi, setelah aku compile..request request nya banyak yang dateng dr Indo, jadi yuk lah..aku mo sok sok an share tips & trick aku sebagai beauty blogger.

Disclaimer dulu yah; Daku bukan blogger terkenal mendunia kayak Michelle Phan ato Bubz Beauty, aku pun juga masi berusaha juggling antara blogging, cari duit, make up, dan jagain Ethan..cuman blog ku yang acak adut ga jelas ini, berhasil untuk jadi The Best Beauty Blogger di Singapura 2 tahun berturut turut di taon 2012 & 2013. 


Dari blog Pinkbuble ini juga, urusan beauty blogger ku ini dicover sama media media..ga cuman di Singapura, tapi juga sampe ke Yahoo Hong Kong, Business News Jepang, dan tentunya di Tanah Air juga, Indonesia melalu Jakarta Post.


Dan juga, jadi beauty blogger gini..gw dapet kesempatan untuk ngisi kolom di Majalah mini Vanity Trove, bagi bagi tips on how to look better.


Trus, salah satu perks on being a beauty blogger itu kan product review yah! Dari pala sampe jari kaki semua disponsor, dari rambut sama slimming, sampe waxing..company company juga email terus untuk long term endorsement, yang menguntungkan mereka dan tentu nya aja, gw :)

Tapi buat aku, nothing is better than being exclusive collaboration with favourite brand..macam SK-II collaboration dan juga brand ambassadorship buat BIOLE Korea. Pas gw tau gw jadi ambassador Biolee ini gw hepi banget loh! Secara ini product Korea, dan juga aduh..kl denger Korea kan kayaknya gimana banget ya..pelem pelemnya gw tonton, dan walo muka gw ga secantik artis korea..tetep aja gw hepi bisa mewakilin brand ini. Dan yang pasti, kl gw ga mulai blog ini as beauty blogger dan ga work hard to achieve it..pasti kesempatan kesempatan yang once in a lifetime macam gini ga mungkin gw dapet kan ya?


I am proud of it, karena ini kan hard work gw yeh? jadi wajarlah ya kalo gw bangga, dan gw tau..ini ga give me right untuk tell you what to and what not to do as beauty blogger. Tapi kalo kamu pingin tau " gw gimana sih supaya bisa jadi beauty blogger? ", aku pingin share pengalaman aku selama ini..dimulai dari..

1. Be Yourself

Ini sih basi banget, tapi old but gold trick ini tuh yang bikin readers berasa kenel sama kamu dengan bacain blogmu. Eh, tapi gimana caranya dong..kl saban kali cuman product review meluluuuu..gimana caranya orang orang berasa kenel coba? Tell them about yourself, bisa dengan cerita personal life kamu, ato tulis " About " section di blog.

Kalo gw, sebelon jadi beauty blogger - kan ini personal blog yah..jadinya gw mulai dari situ.

2. Be a Human

Kalo bukan manusia, jadi apa toh yo? Maksud gw, jadilah layaknya orang normal..ga usah sok perfect. Karena kita semua tau, ga ada yang perfect kan? Jadi show your emotion, kalo hari ini mencong pake eyeliner - admit it, kalo berat naek - admit it, kalo resolution dari taon ke taon untuk kurusin berat badan belon kesampean juga - admit it! --> ini sih gw banget lah ya! hahaha..

3. Have basic beauty knowledge

Ini hukumnya wajib! Kalo mo jadi beauty blogger, tau istilah smokey eye, wing eyeliner, tau bedanya BB cream dan CC cream, ngerti matte/glossy lipstick finishing, tapi apa itu cakey, oxidize foundation, dan juga istilah istilah laennya.

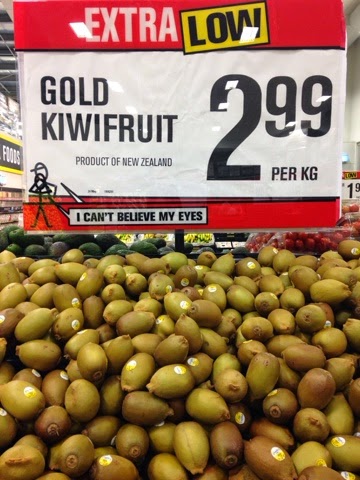
4. Take a good photo

Lebih enak liat photo macam gini, yang ditata cantik..


Ato begini? 2-2 nya photo milik gw pribadi..yang atas, photo product pas gw uda jadi beauty blogger beneran..yang bawah, taon 2010 pas gw moto product aja gituh..


Cari lighting yang bagus, beli aja bunga2an palsu buat backdrop props, kain tulle, ato apapun yang bisa bikin photo jadi lebih stand out. Itu ngebantu banget buat bikin " mood " photo jadi lebih cakep.

5. Keep it going!

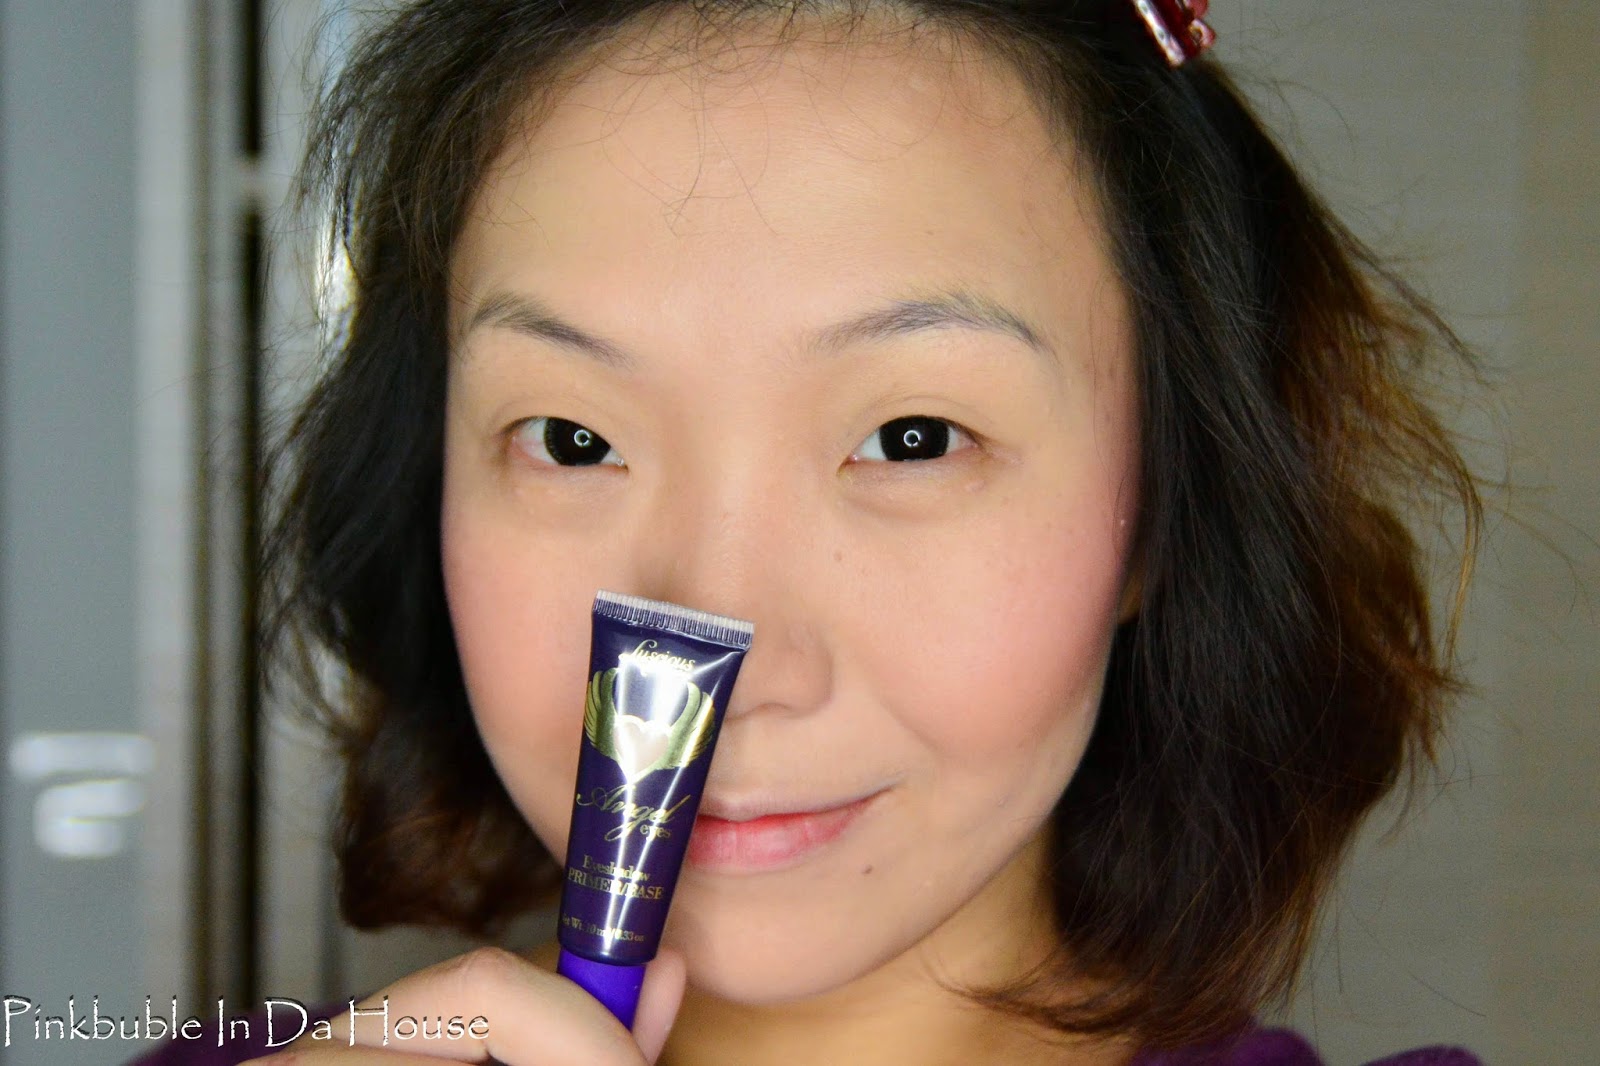
Kalo misalnya satu, dua kali bikin beauty post, ga ada yang komen, page view ga nambah..jangan nyerah! Tulis lagi, cari bahan baru yang menarik..pilih tema yang kira kira orang demen baca. Kalo gw, before after make up tutorial gw yang selalu jadi hit! Contohnya..Korean Make Up tutorial gw yang hitnya ini post uda ampir 30.000 pageviews sendiri. Jadi, coba aja dicari apa yang readers kamu suka dari blog kamu.

6. Be Honest

Hard Truth kalo istilah kerennya mah. Ga perlu nulis sampe " Productnya sih jelek bange tloh, jangan beli..buang duit..nyesel deh gw abis XXX duit buat beli barang Gajebo gini " - Bujug, kalo gw jadi future endorser ato potential advertiser..gw ga bakalan mau collaborate sama blogger model begini. Engga engga deh istilahnya. Tapi bukan berarti product yang KW pun dibilang original, ato online shop yang suka nipu nipu tetep di endorse juga..karena kalo kita sampe begitu, orang ga bakalan lagi percaya sama isi blog kita.

Kalo misalnya terima email dari endorser, coba deh cek dulu productnya..liat review review nya di internet, kalo emang dirasa ga cocok - ya jangan diterima. Jangan demi barang gratis, lumayan bisa buat dikasih ke mama; bikin kita mau untuk nge review sesuatu yang ga cocok sama kulit kita.

Kalo misalnya lagi, pas uda diterima barang yang kita pikir cocok..dan harus nge-review pula, gimana dong? trus ga bole nge bitch ga cocok? jadi nulisnya gimana? Kalo gw, walo mulut slebor gini..gw ga nge trash brand orang, gw akan bilang something like " Is it worth the $XXX i spent? not really. Will i recommend it to someone? Maybe, if the skin type happened to be a match with the product " Lebih enak ga di kuping?

7. Know your standard

Bukan berarti songong mampus ya! Tapi once you make it, akan banyak brand brand yang minta kita promosiin produk mereka, sometimes, for free. To me, I charge them my fee. Blog itu kan sarana advertising juga buat brand kan ya, dan kita tools nya. Kalo kamu rasa product yang diterima dan exposure yang diberikan brand itu setara sama cape nya kita, then let's call it collaboration. Tapi kalo sepihak untungnya di brand yang mo endorse tapi ga mo bayar, just let it go..believe me, kl brand yang ngerti gunanya brand awareness, mereka biasanya punya budget.

Just to share, gw pernah demi temen punya kenelan..gw terima itu endorsement for free. Yang ada gw tekor - karena gw harus naek taxi bolak balik ke lokasi tokonya buat ngeliput, gw cape - karena gw product shooting, story pitching, writing, dan gw keki - karena endorser nya banyak maunya tanpa dengerin maunya gw.

Lesson learned.

Sekian tips & trick sayah yang sotoy untuk jadi beauty blogger! I hope one day, gw bakal lebih successful macam macam Anaz Siantar gitu yah..hahaha..gw suka banget sama Anaz, btw :)
Semoga tulisan ini ngebantu yah, dan kalo misalnya ada pertanyaan ato just to say hi..do drop me email, komen, ato follow sayah di Instagram: @eldiona . 

"Till the next tips & trick
 photo signature-lips.png

May 04, 2015

Balada Pindahan..

Ke negara laen..

Terakhir gw pindah negara itu di 2006, pas gw pindah dari Jakarta ke Singapore dengan 2 biji koper di tangan, Ijasah S1, dan duit tabungan buat modal sebelon dapet kerja. Pada saat itu, gw bener bener excited..dan hayuk lah yuk..kita ber adventure ria di Singapura, ga ada perasaan gimana gimana pas ninggalin Jakarta.

Sekarang, 2015 - Kita pindahan lagi ke New Zealand, dan kali ini pindahannya bawa 20' container saja dong...HAHAHAHA! *ketawa miris* Dan omg, gw mix feeling sampe ga bisa tidur dan nulis blog post ini di jam 3 pagi, bubar sudah deh rencana gw Zumba jam 9 pagi besok.

Hari ini gw berasa gw mulai mo " In Control " lagi untuk semuanya..dan seperti biasa, semuanya still out of control. Jadinya, eczema gw mulai berkeluaran..dan gw ga bisa tidur! Paling sebel tuh kl ada pikiran yah? Kayak nge ganjel gitu..dan jadi sebel sendiri..


Ternyata, pindahan tu rempong aje yeh? walo kita uda hire mover yang termasuk kategori one of the best, tetep aja tetek bengek nya mesti dirapiin..dan ribet pol kl pas lagi berberes, si entong dateng trus ambilin botol parfum gw buat digelindingin, bentar bentar ambil mascara gw buat dimasukin ke bawah kulkas, trus bronzer gw lah, pot pouri lah, dan barang2 laennya - yang bikin proses rapi rapi makin lama, dan ga kelar kelar..

Belon lagi urusan mo rent out apartment gw, mo cari kerjaan baru di NZ, mo unpack dan beberes rumah di NZ, dan mikirin gimana kalo begini..gimana kalo begitu..


Emang sih gw kayaknya mikirin yang belon terjadi gitu, tapi kan..tapi kan..#akusihbegituorangnya banget! Gimana dong? Sini..sini..beri aku tips and trick untuk handle pindahan dengan smooth..huhuhu.
 photo signature-lips.png

Middle East Inspired - Make up tutorial

Little update before I start sharing about my make up tutorial:

We are finally counting down to our moving, New Zealand, here we come!
I couldn't believe that we are finally bought one way ticket to Auckland, it's a mix feeling between excited (to start another adventure!) and scared (of the uncertain future). But, i guess that what makes an adventure worth to take, right? The thrill of facing the unknown :)

This tutorial might be the last tutorial I made in Singapore, the next make up tutorial will be from Auckland, New Zealand! Woohooooo!!

Anyhoo..for this tutorial, I'll be using Luscious cosmetic Singapore, this is generously sponsored to me and ugh, I am already liking it. I'll be sharing on how to achieve the before to after look below:
Make up makes me happy, and it definitely makes me look different too! I love experimenting with colors and eyeliner, and if you notice I created a thick liner in my " after " look, inspired by the middle east make up that I incorporated to my Asian look. I hope you guys like it :)

Let's get started!

These are the base make up, and the foundation I use for this tutorial. I'm not gonna go details on the products review and the ingredients, but if you are interested to read more; by all means, please visit Luscious Cosmetics Singapore or check out at the Luxola websites. What I'm going to tell you is how the products works on my skin, and what are the pro and cons in it.


To start, I apply the Whitening base (for dry/normal skin) all over my face. This step, instantly brightens up my face and keep the blemishes and my under eye off tone slightly better. If you have oily face, please don't use this product. I notice that my dry skin becomes really moisturized the moment, it sits in on my skin. Which is in my case, works wonder!


Once the whitening base is set, I combine the flawless liquid foundation with the HD mineral foundation. The reason why I combine this 2 different type of foundation is to get the consistency I want. The flawless finish liquid foundation is thicker with high coverage - but I don't feel like covering all face with this, so I dilute it with the HD mineral foundation. 

The HD mineral foundation has a watery and light texture compare to the flawless finish, I personally think this is good for daily foundation. I don't wear foundation on my normal days, but if you do - this is a good choice.


Some like to apply it with beauty blender, some like to use warm finger to blend it into skin, and I like to apply it with brush, and blend it with sponge (when I am working for a client), and spread it evenly with my finger (at home).

Apply it as you like, all you need to make sure is the finishing must be smooth and blend nicely with your skin. I like to draw butterfly wing technique and spread it outward, this will help to achieve that evenly spread foundation look.


Always remember to set any liquid application with powder. 
I use Flawless Finish Powder Foundation.


This is a powder foundation, so it has high coverage compare to loose powder. DO note, if you apply with the sponge that comes with it - it will build up the coverage over the liquid foundation. If this is what you would like to achieve, then probably you can damp up your sponge first :)


I use brush to pick up the light pigment.


- APOLOGIZE for the inconsistent lighting; I took photo with my ring light in front of my big window, and that day..the weather was like sunny thunder storm kind of day- 

Shading time! 
This product is nor Luscious cosmetics, this is actually some Japanese brand I bought during my media trip to Tokyo. Definitely a good buy with awesome quality.


I contour my face, like all the time!! I mean whenever I put my make up on, I ALWAYS do this simple yet powerful step. I think i look flat when I am not contouring my face, and take a look at my simple chart on the area that you can easily contour to make your face more dimensional.


As simple as dusting some contour powder on the hair line, the sides of nose bridge, under the cheekbone, and chin area. This way, it brings the attention to the center area.


The next step, is completely optional - you can do your blush on the later part as well. But, I like to see how my complexion done before I start my eye make up. This is to avoid looking " Too much effort " kind of make up. You know those moment when you finish doing your eyes, then blush, then your lips, and you realized - shit, no..no..no! Give me some tissue! and you start wiping your make up off..^^


Once I am done with the blush, I apply the Angel Eyes Eyeshadow primer. In my opinion, the texture is very pigmented and strong for eye primer - so, you might want to just apply a little dot on your finger and spread it evenly on the eyelid.


I like to rub the primer between my finger to somehow " warm " it for easier application.


..and the excess primer to fading out my lips color..


Now, I am ready for the most interesting part..Eye MakeUp!


I'll be using the Spring Bloom eyeshadow palette for this look. The color is gorgeous, and pretty pigmented, but it is slightly powdery - I think it is best to apply primer first to keep the powdery effect less powdery ^^ and makes the color does stands out even more.


Left: Without Primer. Right: With Primer


I think tutorial, I'll be using this shimmery beige as my base, dark purple, and moss green eyeshadow to bring out a little spring in the look. Not to mentioned that I am currently super like this kind of green from the Arrow movie. :D


Take a look on my amateur diagram below. Ok, first I need to explain why I end up drawing this kids like like for my tutorial! It's because le hubby fall asleep without installing photoshop in the computer, and I want to start drafting..like..on that second! So, I drew it with paint. -_-'

Anyway..Apply the base color all over the eyelid, and the dark purple color until the eye socket area.
If you like to use 2 eyeshadow color, you can stop here and proceed to lashes step. But if you don't, then..let's scroll now :)


Top the moss green color on the eye socket area and blend it higher, leaving the purple color hidden underneath. I know it might looking a lil meh', right now, just stay with me a lil longer; I'll prove you the otherwise. :)


Stick your favourite faux lash just right above the natural lash..


..and take your blending brush to soften the eye shadow edge.


If you are doing it right, your eye make up will look like this..and you are ready for the eyeliner!


I will not go into details for the eyeliner, but just in case you would like to know what eyeliner I am using, it's Starlash liquid eyeliner in black. I am drawing it in arch-y shape, and 1/3 longer than my natural eye shape. 


Then, I apply pencil eyeliner on the lower waterline to create the dramatic eye look.


Once we are done with the eye makeup, Don't forget to draw your eyebrow..and apply the Luscious signature lipstick in Ice Rasberry (right), this color is subtle enough to stand out in my face. LOL - what kind of explanation is this?


 This is what I am talking about..the perfect icy lips look that I think goes well with most of make up.


I know this might not be the everyday make up look, but hey..let's have some fun in creating the beauty of make up, shall we? 


How do you like this tutorial? I still have something to play with Luscious cosmetics..do throw me ideas on the look I should created in the future?

If you wonder where can you get this gorgeous cosmetics at, you can hop on to LUXOLA.COM - LUSCIOUS (of course!) to get it!

Have fun shopping!

 photo signature-lips.png

LinkWithin

Related Posts Plugin for WordPress, Blogger...